


How to Check a Solenoid Valve
2025-08-07
How to Check a Solenoid Valve?A Complete Troubleshooting Guide
Solenoid valves are workhorses in countless industrial, commercial, and residential systems, controlling the flow of liquids, gases, and other media with precision. From irrigation systems and HVAC units to manufacturing lines and appliances, a properly functioning solenoid valve is critical for efficiency and safety. But like any mechanical component, solenoid valves can fail over time—leaving you with leaks, blocked flow, or unresponsive systems. Knowing how to check a solenoid valve is essential for diagnosing issues early and avoiding costly downtime. In this guide, we’ll walk you through the steps to inspect, test, and troubleshoot a solenoid valve, ensuring you can identify problems and restore functionality quickly.
Understanding Solenoid Valves: The Basics
Before diving into how to check a solenoid valve, it’s important to grasp how these devices work. A solenoid valve uses an electromagnetic coil to control a plunger or diaphragm, which opens or closes the valve to regulate fluid flow. When an electrical current is applied to the coil, it generates a magnetic field that lifts the plunger, allowing media to pass through. When the current is cut off, a spring returns the plunger to its closed position, stopping the flow.
This simple yet effective design makes solenoid valves versatile, but their reliance on both electrical and mechanical components means multiple points of potential failure. Common issues include burnt-out coils, stuck plungers, clogged ports, or loose electrical connections—all of which can be identified with a systematic check.
Signs Your Solenoid Valve Needs Checking
How do you know when it’s time to check a solenoid valve? Watch for these red flags:
- No flow when the valve should be open (e.g., a sprinkler zone failing to activate).
- Continuous flow even when the valve is supposed to be closed (leading to leaks or overflows).
- Intermittent operation, where the valve works sporadically.
- Unusual noises, such as buzzing or clicking without corresponding flow changes.
- Visible leaks around the valve body or connections.
If you notice any of these issues, it’s time to roll up your sleeves and check the solenoid valve.
Preparing to Check a Solenoid Valve: Safety & Tools
Checking a solenoid valve requires caution, especially when dealing with electrical components and pressurized systems. Follow these steps to prepare safely and gather the right tools.
Safety First: Critical Precautions
- Disconnect Power: Always turn off the electrical supply to the solenoid valve before starting. This prevents electric shock and avoids accidental activation during testing.
- Relieve Pressure: If the valve is part of a pressurized system (e.g., water lines, gas pipes), shut off the main supply and open a downstream tap to release any remaining pressure. This prevents sudden media release when disassembling parts.
- Wear Protective Gear: Use gloves to protect against sharp edges, and safety glasses if working with liquids or gases that could spray.
- Check for Hazardous Media: If the valve controls flammable, toxic, or corrosive substances, follow specific safety protocols for your industry—this may include venting lines or using specialized tools.
Tools You’ll Need
- Multimeter: To test electrical continuity and voltage in the solenoid coil.
- Screwdrivers: Flathead and Phillips to disassemble the valve housing and access connections.
- Wrenches: Adjustable or socket wrenches to loosen fittings (if needed).
- Clean Cloth: For wiping debris or moisture from components.
- Lubricant: Silicone-based lubricant (avoid oil-based products, which can damage rubber seals).
- Compressed Air or Water: To flush out debris from valve ports (use cautiously, depending on the media type).
With safety measures in place and tools at the ready, you’re set to check the solenoid valve.
Step-by-Step Guide: How to Check a Solenoid Valve
Follow these steps to systematically inspect and test your solenoid valve, starting with simple checks and moving to more detailed tests.
Step 1: Visual Inspection
Begin with a visual check to spot obvious issues. A quick glance can often reveal problems like leaks, corrosion, or loose wires.
- Check the Valve Body: Look for cracks, rust, or signs of physical damage. Leaks around the housing may indicate a damaged seal or loose fitting.
- Inspect Connections: Ensure electrical wires are securely attached to the solenoid coil terminals. Loose or frayed wires can cause intermittent operation.
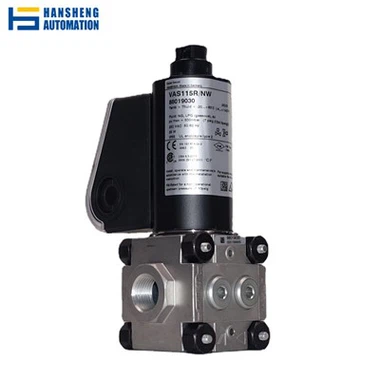
- Examine the Coil: The coil (the cylindrical component on top of the valve) should be free of burns, bulges, or discoloration—these are signs of overheating or electrical failure.
- Check for Debris: If the valve is accessible, look for dirt, sediment, or foreign objects around the inlet/outlet ports, which can block flow.
If you find loose connections, tighten them (after ensuring power is off). For visible damage like cracks, the solenoid valve may need replacement, but continue testing to confirm.
Step 2: Test the Electrical Supply
A solenoid valve won’t work without proper voltage. Use a multimeter to verify the electrical supply is reaching the valve.
- Set Up the Multimeter: Switch it to the AC or DC voltage setting, depending on your valve’s power source (check the valve’s label for specifications).
- Reconnect Power Temporarily: Turn the electrical supply back on (ensure the system is still depressurized).
- Measure Voltage at Terminals: Touch the multimeter probes to the solenoid coil’s terminals (positive to positive, negative to negative for DC; no polarity for AC). The reading should match the valve’s rated voltage (e.g., 12V, 24V, 120V).
- If voltage is correct: The issue is likely with the valve itself (e.g., faulty coil or stuck plunger).
- If voltage is low or absent: Check wiring, fuses, or control switches for breaks or malfunctions. A lack of power is often the culprit behind unresponsive solenoid valves.
After testing, turn off the power again before proceeding.
Step 3: Check the Solenoid Coil for Continuity
A burnt-out coil is a common cause of solenoid valve failure. Testing for continuity (a complete electrical path) will tell you if the coil is functional.
- Disconnect the Coil: Remove the wires from the coil terminals. If the coil is screwed or clamped to the valve body, detach it carefully.
- Set Multimeter to Ohms: This measures resistance. Touch the probes together to calibrate (the reading should be near 0).
- Test Coil Resistance: Touch one probe to each coil terminal. Refer to the valve’s specifications for the expected resistance range (typically 50–1000 ohms, depending on size and voltage).
- If resistance is within range: The coil is likely good.
- If resistance is infinite (OL): The coil is burnt out and needs replacement.
- If resistance is much lower than specified: The coil may have a short circuit, requiring replacement.
A faulty coil means the solenoid valve can’t generate the magnetic field needed to open—so replacing the coil (or the entire valve) is necessary.
Step 4: Manual Operation Test
If the coil checks out, the next step is to test the valve’s mechanical components. Many solenoid valves have a manual override (a small lever or screw) to open the valve without power, allowing you to check for stuck parts.
- Locate the Manual Override: Refer to the valve’s manual—override mechanisms are often on top of the coil or near the valve body.
- Activate the Override: Move the lever to the “open” position or turn the screw (some require a screwdriver).
- Check for Flow: Reopen the media supply (without power to the coil) and see if fluid/gas flows through the valve.
- If flow occurs: The mechanical components (plunger, spring, seals) are likely functional. The issue may be electrical (e.g., a bad connection) or related to the coil.
- If no flow occurs: The valve is stuck closed. Debris, corrosion, or a damaged plunger/spring could be blocking movement.
If the valve is stuck, disassemble the body (following safety steps) to clean or replace parts like the plunger or seals.
Step 5: Inspect for Blockages or Leaks
Even if the valve opens manually, blockages or leaks can impair performance.
- Check Ports and Seals: Disassemble the valve body to inspect inlet/outlet ports for debris (e.g., dirt, scale, or media residue). Clean with a cloth or flush with compressed air/water (avoid damaging rubber seals).
- Examine Seals and Diaphragms: Look for cracks, wear, or swelling in rubber seals—these can cause leaks. Replace any damaged seals with manufacturer-recommended parts (using the wrong material may lead to chemical incompatibility).
- Test for Leaks: Reassemble the valve, restore power and media supply, and check for leaks around connections, seals, or the valve body. Tighten fittings or replace parts as needed.
A clean, well-sealed solenoid valve should open/close smoothly and maintain a tight seal when closed.
Troubleshooting Common Solenoid Valve Issues
Even after checking, some problems may persist. Here’s how to address frequent issues:
Coil Failure
- Causes: Overvoltage, moisture ingress, or overheating (from continuous operation beyond the valve’s duty cycle).
- Fix: Replace the coil with a matching voltage/rating. Ensure the new coil is compatible with the valve model.
Sticking Plunger
- Causes: Debris buildup, corrosion, or dried lubricant.
- Fix: Clean the plunger and valve bore. Apply a thin layer of silicone lubricant to moving parts (avoid oil-based products, which can attract dirt).
Leaks
- Causes: Damaged seals, loose fittings, or a cracked valve body.
- Fix: Replace seals, tighten fittings, or replace the valve if the body is cracked.
Intermittent Operation
- Causes: Loose electrical connections, voltage fluctuations, or a coil on the verge of failure.
- Fix: Secure connections, check for voltage spikes (use a surge protector), or replace the coil if resistance is unstable.
Maintenance Tips to Extend Solenoid Valve Life
Regular maintenance can reduce the need for frequent checks and extend the solenoid valve’s lifespan:
- Clean Filters: If the system has inlet filters, clean or replace them regularly to prevent debris from reaching the valve.
- Inspect Coils Annually: Check for signs of overheating or damage, especially in harsh environments (high humidity, dust, or vibration).
- Lubricate Moving Parts: Use manufacturer-approved lubricants on plungers and springs every 6–12 months (depending on usage).
- Test Voltage Supply: Ensure the electrical system provides stable voltage to avoid coil damage.
- Replace Seals Proactively: Rubber seals degrade over time—replace them every 1–2 years (or as recommended) to prevent leaks.
FAQ
Q: How often should I check a solenoid valve?
A: For critical systems (e.g., industrial machinery), check monthly. For residential use (e.g., sprinklers), check seasonally or if performance issues arise.
Q: Can I repair a solenoid valve, or should I replace it?
A: Minor issues (e.g., dirty ports, loose connections, or a faulty coil) can be repaired. Severe damage (cracked body, irreparable plunger) requires replacement.
Q: Why does my solenoid valve buzz but not open?
A: A buzzing coil often means it’s receiving power but can’t generate enough force to open the valve—causes include a weak spring, debris blocking the plunger, or a partially failed coil.
Q: Are all solenoid valve coils interchangeable?
A: No. Coils must match the valve’s voltage, size, and mounting style. Using the wrong coil can damage the valve or cause failure.
Q: Can a solenoid valve freeze?
A: Yes, if the media is water and temperatures drop below freezing. Insulate valves in cold environments or use heated enclosures to prevent freezing damage.
Q: How do I know if my solenoid valve is compatible with the media it’s controlling?
A: Check the valve’s material specifications (e.g., brass for water, stainless steel for corrosives). Using a valve with incompatible materials can cause leaks or degradation.
What is the Main Function of a DC Motor
Which is better, an AC or DC motor
Related Article

Brushless DC (BLDC) motors are widely used in EVs, drones, industrial machinery, and robotics for their efficiency and long lifespan. Unlike brushed motors—where reversing direction only requires swapping power leads—BLDC motors rely on electronic commutation, making direction reversal more nuanced.
How to Reverse Direction in Brushless Motors
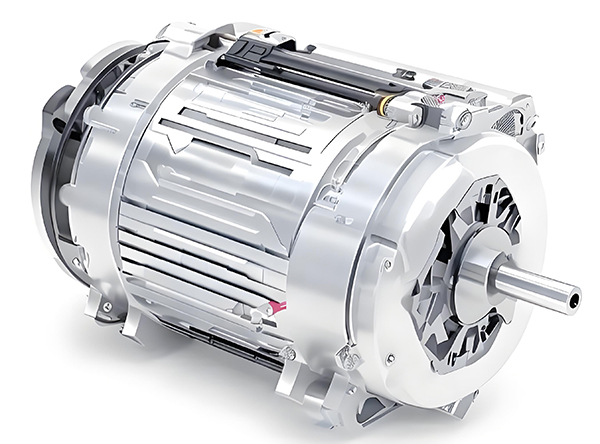
Brushed and brushless DC motors are two of the most common electric motor designs, powering everything from toys to electric vehicles. While both convert electrical energy to mechanical motion, their internal structures, performance, and use cases differ drastically.
What’s the Difference Between a Brushed and Brushless Motor
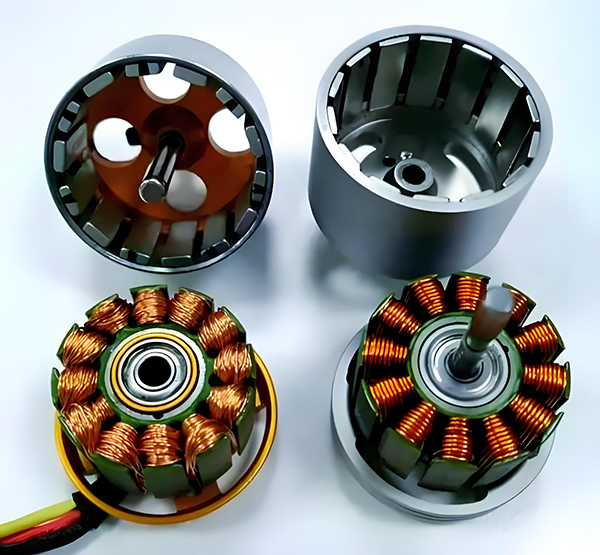
Brushed DC motors are reliable, but wear and tear over time can lead to failure. Whether you’re troubleshooting a power tool, household appliance, or industrial conveyor motor, knowing the signs of a bad brushed motor saves time and prevents further damage.
How to Know If a Brushed Motor Is Bad
