


How to Control a Stepper Motor
2025-06-27
How to Control a Stepper Motor?
Controlling a stepper motor requires a strategic blend of hardware configuration, signal processing, and software logic to achieve precise, reliable motion. Unlike traditional DC motors that rely on simple voltage adjustments, stepper motors demand deliberate control over phase energization sequences, pulse frequencies, and current levels to execute their signature step-by-step movements. In this guide, we’ll break down the core components of a stepper motor control system, explore different control modes, discuss advanced techniques for optimizing performance, and provide practical examples for the most common applications.
1. Core Components of a Stepper Motor Control System
Controlling a stepper motor effectively requires understanding these critical hardware and software building blocks:
1.1 Stepper Motor Drivers
The driver is the bridge between low-power control signals and the high-current requirements of the motor windings. Its primary functions include:
- Current Regulation: Ensures each phase receives the rated current (e.g., 2A per phase for a NEMA 23 motor) to prevent overheating and maximize torque.
- Phase Sequencing: Generates the correct energization order for stator phases (e.g., A+, B+, A-, B- for a 2-phase motor).
- Signal Amplification: Converts microcontroller-level signals (5V/3.3V) into motor-compatible voltages (12V, 24V, or higher).
Driver Types by Technology:
- Bipolar Drivers: For hybrid and permanent magnet motors, support current reversal in both directions (essential for full directional control).
- Unipolar Drivers: Older technology for permanent magnet motors, use center-tapped windings but offer limited torque compared to bipolar.
- Micro-Step Drivers: Modern drivers with built-in digital signal processing (DSP) to enable sub-step resolutions (e.g., 1/32 micro-stepping).
1.2 Control Signals from Microcontrollers
A microcontroller (e.g., Arduino, Raspberry Pi, or PLC) sends two critical signals to the driver:
- STEP Signal: A digital pulse train where each rising/falling edge triggers one step. The pulse frequency determines speed (e.g., 200 pulses/second = 1 RPM for a 200-step/rev motor).
- DIRECTION Signal: A high/low voltage level that sets the rotation direction by reversing the phase sequence.
1.3 Feedback Devices (for Closed-Loop Systems)
While steppers often operate in open-loop, feedback sensors improve accuracy in demanding applications:
- Encoders: Optical or magnetic devices that count steps to detect position (resolves missed steps in high-load scenarios).
- Limit Switches: Mechanical sensors to define home positions or travel limits, essential for homing routines.
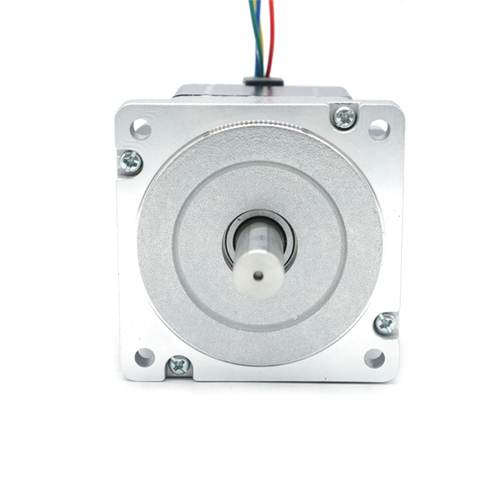
2. Fundamental Control Modes: From Full-Step to Micro-Step
The way phases are energized defines the motor’s step resolution, torque output, and motion smoothness.
2.1 Full-Step Control (Basic Mode)
- Operation: Energizes one or two phases at a time using the motor’s native step angle (e.g., 1.8° for a 200-step hybrid motor).
- Sequencing Examples:
-
- Single-Phase Excitation: A+ → B+ → A- → B- (lower torque, higher resonance).
-
- Two-Phase Excitation: A+B+ → B+A- → A-B- → B-A+ (higher torque, smoother than single-phase).
- Advantages: Simple to implement, maximum torque at low speeds.
- Disadvantages: Coarse resolution, audible vibration at low speeds, risk of resonance at certain frequencies.
2.2 Half-Step Control (Intermediate Resolution)
- Operation: Alternates between single-phase and two-phase energization, effectively doubling resolution.
- Step Angle: Half the native angle (e.g., 0.9° for the same 200-step motor).
- Sequence: A+ → A+B+ → B+ → B+A- → A- → A-B- → B- → B-A+ → A+ (8 steps per full cycle).
- Advantages: Smoother motion than full-step, better low-speed stability.
- Tradeoff: Slightly reduced torque during single-phase excitation (约 10-15% torque dip).
2.3 Micro-Step Control (Fine-Grained Precision)
- Operation: Uses fractional phase currents to create sub-steps (e.g., 1/16 or 1/32 of the native step angle).
- How It Works:
-
- The driver applies partial current to multiple phases (e.g., 70% to Phase A and 30% to Phase B) to create a resultant magnetic field between full-step positions.
-
- Resolution can reach as fine as 0.005625° per micro-step (1/32 micro-stepping on a 0.18° motor).
- Advantages:
-
- Ultra-smooth motion with minimal vibration or noise.
-
- Ideal for applications requiring sub-millimeter precision (e.g., 3D printers, CNC routers).
- Requirements:
-
- Drivers with analog current control or digital-to-analog converters (DAC).
-
- Higher computational load for generating precise current ratios.
3. Advanced Control Techniques for Optimal Performance
3.1 Speed Profiling (Ramp Control)
Stepper motors have limited acceleration capabilities due to rotor inertia. Speed profiling prevents missed steps by gradually increasing/decreasing pulse frequency:
- S-Shaped Profile: Smooth acceleration/deceleration to minimize mechanical stress (used in high-precision machinery).
- Trapezoidal Profile: Constant acceleration until reaching max speed, then constant deceleration (suitable for most applications).
- Code Example (Arduino):
void accelerate(int targetSpeed) { for (int speed = startSpeed; speed <= targetSpeed; speed += increment) { stepInterval = 1000000 / speed; // Convert speed (steps/sec) to microsecond delay stepMotor(); // Send step pulse delayMicroseconds(stepInterval); } } 3.2 Current Control for Torque Management
- Holding Torque Optimization: Reduce current during idle to prevent overheating (many drivers support "sleep mode" or automatic current reduction).
- Dynamic Current Adjustment: Increase current during high-load phases (e.g., during acceleration) and decrease it during coasting.
- Tools: Drivers with current limit pots or digital interfaces (e.g., Trinamic TMC2209 for software-based current control).
3.3 Closed-Loop Control with Feedback
For applications where position accuracy is critical (e.g., medical devices, industrial robotics), add feedback to create a closed-loop system:
- Encoder Integration:
-
- Compare actual position (from encoder) with target position.
-
- Adjust phase sequencing to correct errors (e.g., if the motor missed a step, send an extra pulse).
- PID Controllers:
-
- Proportional-Integral-Derivative control maintains constant speed by adjusting pulse frequency in real time based on speed error.
-
- Formula:
 , where
  is the speed difference between target and actual.
- Formula:
4. Practical Control Scenarios: From DIY to Industrial
4.1 Basic Open-Loop Control (Hobby Projects)
- Components: Microcontroller (Arduino), bipolar driver (A4988), NEMA 17 motor.
- Setup:
// Simple speed control with delay void stepMotor() { digitalWrite(stepPin, HIGH); delayMicroseconds(stepInterval); digitalWrite(stepPin, LOW); delayMicroseconds(stepInterval); } - Connect STEP and DIRECTION pins from Arduino to the driver.
- Send step pulses with varying delays to control speed.
- Use Cases: Small CNC machines, 3D printer extruders, robotic arm joints.
4.2 Precision Positioning with Micro-Stepping (Mid-Range Applications)
- Configuration:
-
- Driver: TMC2208 (supports 1/32 micro-stepping).
-
- Motor: Hybrid NEMA 23 (1.8° native step, 0.05625° per micro-step).
- Advantages:
-
- Reduced resonance allows operation at higher speeds with less vibration.
-
- Suitable for applications like laser engravers (requires 0.1mm positional accuracy).
4.3 Industrial-Grade Closed-Loop Control
- System Design:
-
- Controller: PLC (Programmable Logic Controller) for deterministic control.
-
- Feedback: Absolute encoder (1024 pulses/rev) for zero position reference.
-
- Driver: High-power bipolar drive with overcurrent protection (e.g., 10A per phase).
- Key Features:
-
- Homing routine using limit switches to establish machine coordinates.
-
- Real-time error correction for load variations (e.g., in CNC milling under heavy cutting forces).
5. Troubleshooting Common Control Issues
5.1 Missed Steps
- Causes:
-
- Excessive load torque exceeding the motor’s dynamic torque capacity.
-
- Too high pulse frequency (above the motor’s pull-in speed).
-
- Inadequate driver current (check current limit settings).
- Solutions:
-
- Downsize the load or switch to a higher-torque motor (e.g., NEMA 23 instead of NEMA 17).
-
- Implement speed ramping to gradually increase pulse frequency.
5.2 Vibration at Low Speeds
- Causes: Resonance from full-step operation at frequencies matching the motor’s natural vibration mode.
- Solutions:
-
- Switch to half-step or micro-step mode (reduces step angle and vibration amplitude).
-
- Add mechanical dampers or use rubber couplings to isolate motor vibrations.
5.3 Overheating Drivers/Motors
- Causes: Continuous operation at maximum current, poor ventilation, or incorrect driver settings.
- Solutions:
-
- Reduce idle current using the driver’s sleep function (e.g., 50% current during standby).
-
- Ensure proper heat sinking for drivers (especially in high-power applications).
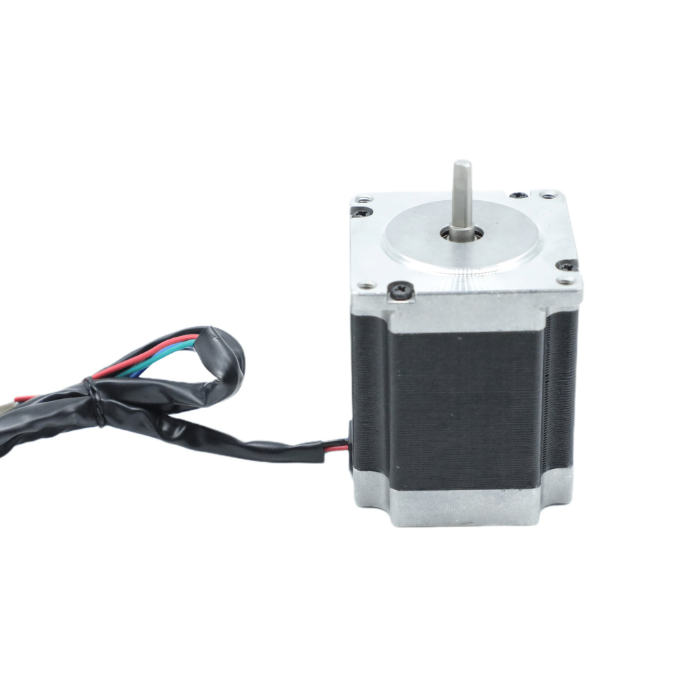
6. Choosing the Right Control Method for Your Application
Use this decision matrix to select the optimal control strategy:
|
Application Requirement
|
Full-Step
|
Half-Step
|
Micro-Step
|
Closed-Loop
|
|
Precision
|
Low (1.8°+)
|
Medium (0.9°)
|
High (0.09°-)
|
Ultra-High (±1 step)
|
|
Torque at Low Speeds
|
High
|
Medium-High
|
Medium
|
High (adaptive)
|
|
Speed Range
|
Narrow
|
Moderate
|
Wide
|
Very Wide
|
|
Complexity
|
Simple
|
Moderate
|
Complex
|
Very Complex
|
| Typical Application |
Simple robotics
|
3D printer axes
|
CNC routers
|
Industrial robots
|
7. Future Trends in Stepper Motor Control
- Integrated Smart Drivers: Onboard microcontrollers (e.g., STM32-based drivers) that auto-tune current and step modes based on real-time load data.
- Wireless Control: Bluetooth/LoRa-enabled drivers for remote monitoring and adjustment in IoT applications (e.g., smart factory conveyors).
- Energy-Efficient Control: Algorithms that dynamically adjust phase currents based on instantaneous torque needs, reducing power consumption by up to 30%.
Conclusion
Controlling a stepper motor effectively requires a clear understanding of how hardware (drivers, sensors) and software (pulse generation, feedback loops) work together to translate digital signals into precise motion. Whether you’re building a DIY 3D printer with basic open-loop control or configuring a high-precision industrial robot with closed-loop feedback, the key is to match the control method to your application’s needs for resolution, torque, and reliability.
By mastering step sequencing, micro-stepping, speed profiling, and feedback integration, you can unlock the full potential of stepper motors—harnessing their unique ability to provide accurate, repeatable motion in everything from consumer electronics to heavy machinery. Remember: the devil is in the details of driver configuration and signal timing, but the reward is a motion system that’s as precise as it is powerful.
What Is a Stepper Motor Used For
How Does a Stepper Motor Work
Related Article

Brushless DC (BLDC) motors are widely used in EVs, drones, industrial machinery, and robotics for their efficiency and long lifespan. Unlike brushed motors—where reversing direction only requires swapping power leads—BLDC motors rely on electronic commutation, making direction reversal more nuanced.
How to Reverse Direction in Brushless Motors
Brushed and brushless DC motors are two of the most common electric motor designs, powering everything from toys to electric vehicles. While both convert electrical energy to mechanical motion, their internal structures, performance, and use cases differ drastically.
What’s the Difference Between a Brushed and Brushless Motor
Brushed DC motors are reliable, but wear and tear over time can lead to failure. Whether you’re troubleshooting a power tool, household appliance, or industrial conveyor motor, knowing the signs of a bad brushed motor saves time and prevents further damage.
How to Know If a Brushed Motor Is Bad
